|
Art quilters often compare their fabrics to an artist’s palette of paints. The same can be said for those who have discovered thread painting, although in this case, the threads are like crayons or colored pencils, and the fabric is the paper. Thread painting is a method of densely covering fabric with machine stitches—either on a home sewing machine or a longarm machine. It is similar to free-motion quilting, in that you drop the feed dogs and move the fabric around freely as you work. An alternative is thread sketching, which simply highlights certain areas of a design with free-motion stitches, a less time-consuming prospect as the stitching is not so dense. Both are thoroughly enjoyable and mesmerizing, justifiably making a quilter feel like an artist. I started out by tracing my design onto cotton fabric, then stabilized the fabric with two layers of iron-on interfacing. 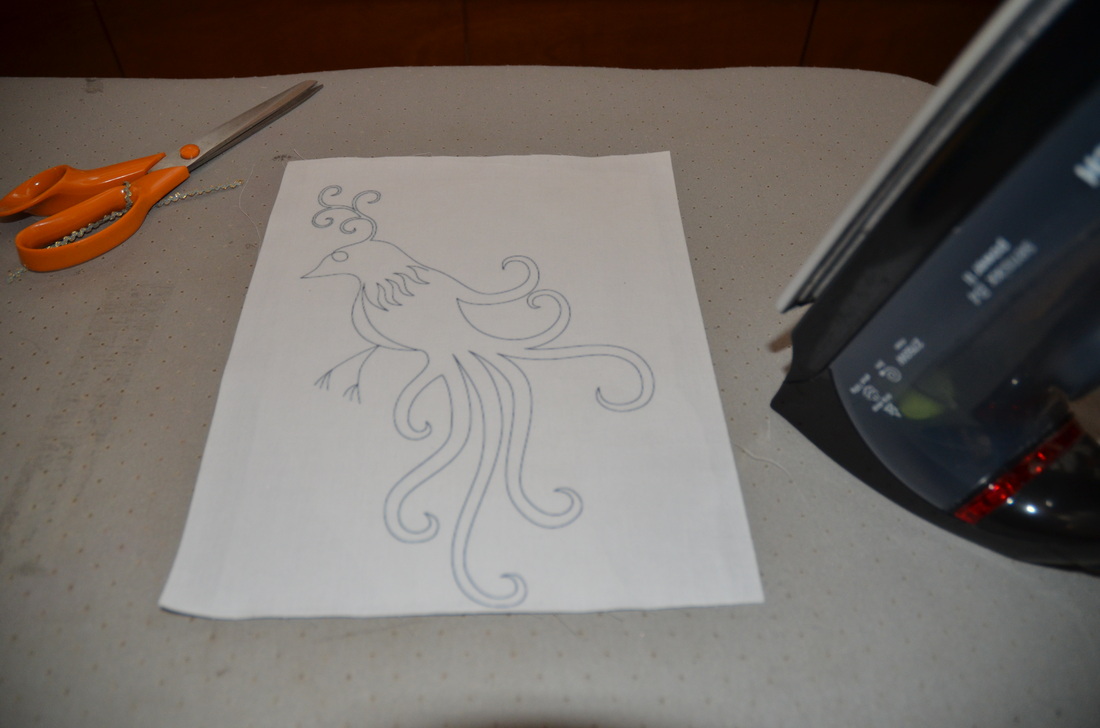 I inserted the first area I wanted to stitch into a clip frame. I dropped the feed dogs on my sewing machine, threaded the machine with black thread, and drew up the bobbin thread before beginning, as shown here. I made a couple of stitches, then trimmed off the threads so they wouldn't be in the way. 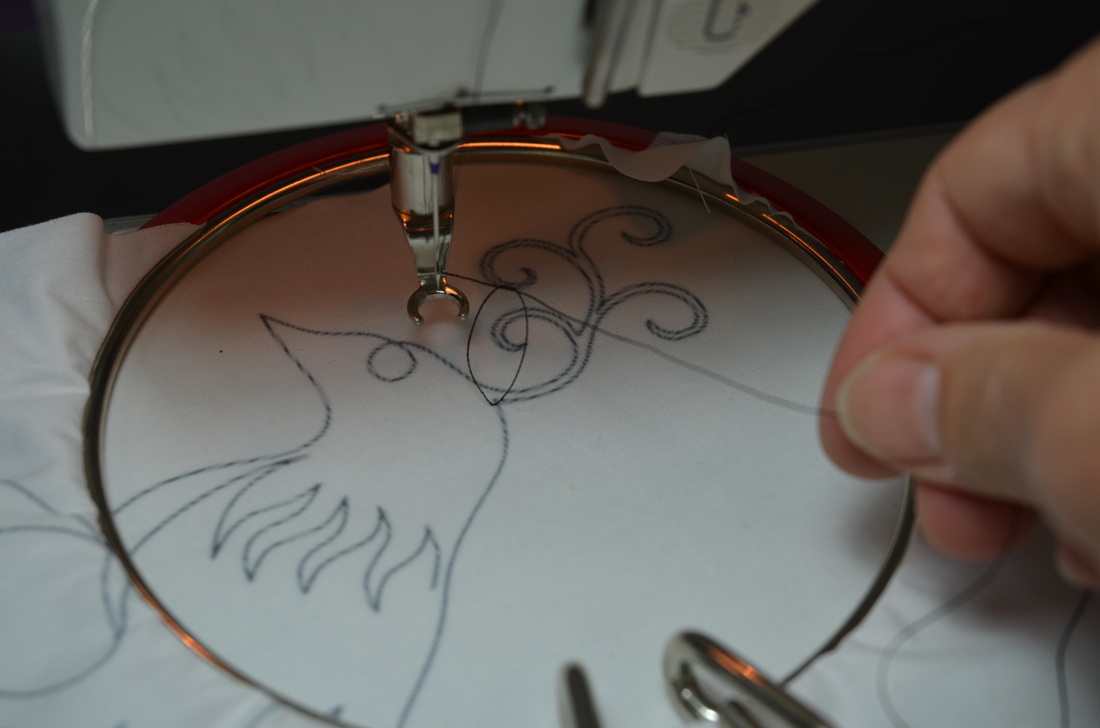 I set the stitch length to zero and the stitch to zigzag. First, I outlined the bird with zigzag stitch, working slowly, with the stitching line of the design always in a horizontal position. (I usually have two hands on the hoop, but my right hand was holding the camera and taking the photo!) I moved the work from side to side as I stitched, turning the work continually in the curved areas. It helps if you can program the needle to stop in the down position so that the work doesn't shift out of place when you stop stitching to take a break.  Once the whole bird was outlined in black, I threaded the machine with a variegated blue/green, and changed to straight stitch. I made a series of stitches across the design, to imprecisely cover the area to be filled in - making a padded background of straight lines. These stitches do not have to be perfect as they form a base that will be hidden by the later stitches. 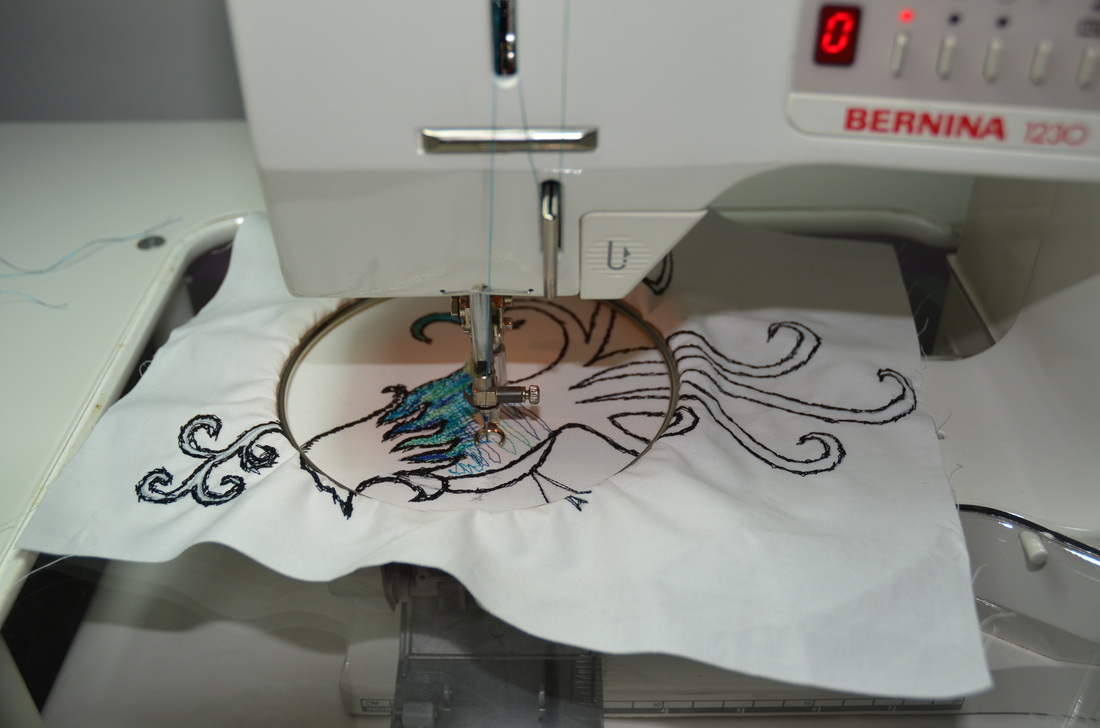 I changed back to zigzag stitch to fill in the design, following the natural direction and curves of the design. It's important to stitch carefully, thoroughly filling in any gaps that form. The needle may begin to make a knocking sound as it stitches through thick threads; this is normal. 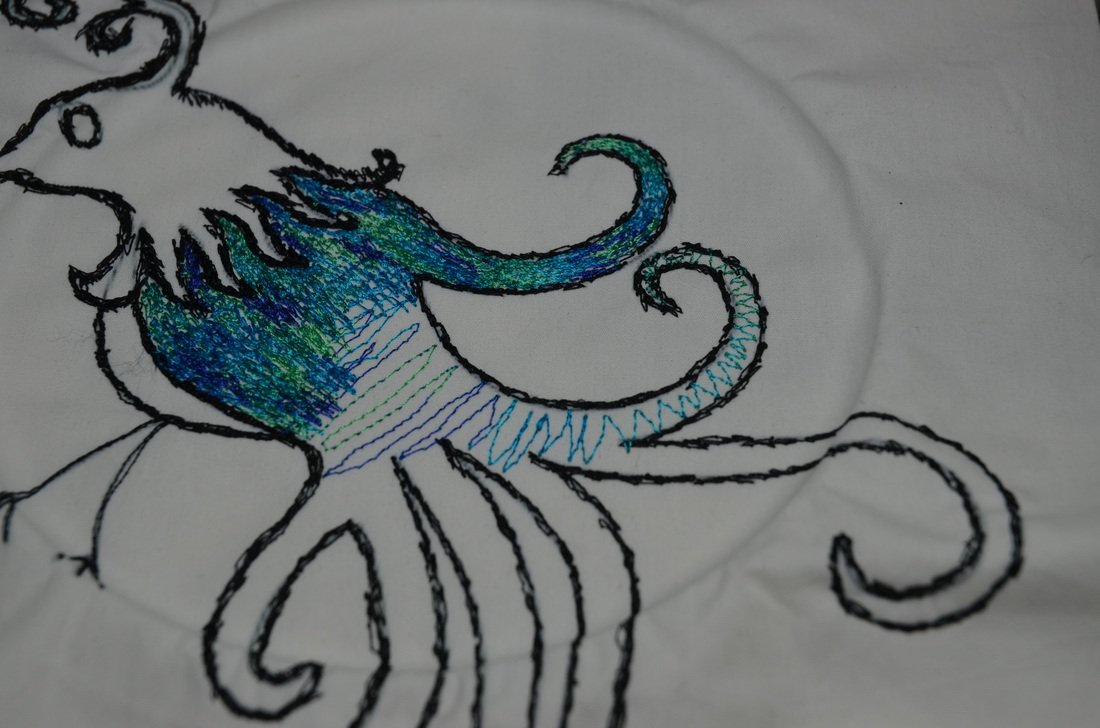 The previous image shows some of the straight "padding" stitches, as well as the zigzag filler stitches on top. You can add highlights with different color threads if you wish. Try to vary the length and position of all the stitches to create a natural, random appearance. If your design is larger than the hoop, re-hoop as required.
I haven't finished thread painting the bird yet, but will post an image of it when I'm done.
13 Comments
It has been a long time since I posted anything, mostly because I've been working flat out on the book. Well, the book is almost done. All the text has been written, the artwork is nearly completed, and Jane has just about finished laying out all the pages. It's hard to believe, but within a week or so, this book will be out of my hands, and not a moment too soon! 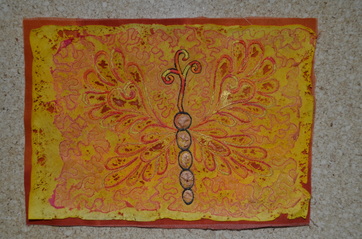
This butterfly was done for the section on synthetic materials. First, I painted a sheet of medium weight Lutradur yellow, and let it dry. Then I treated it with Bubble Jet Set solution and hung it to dry. 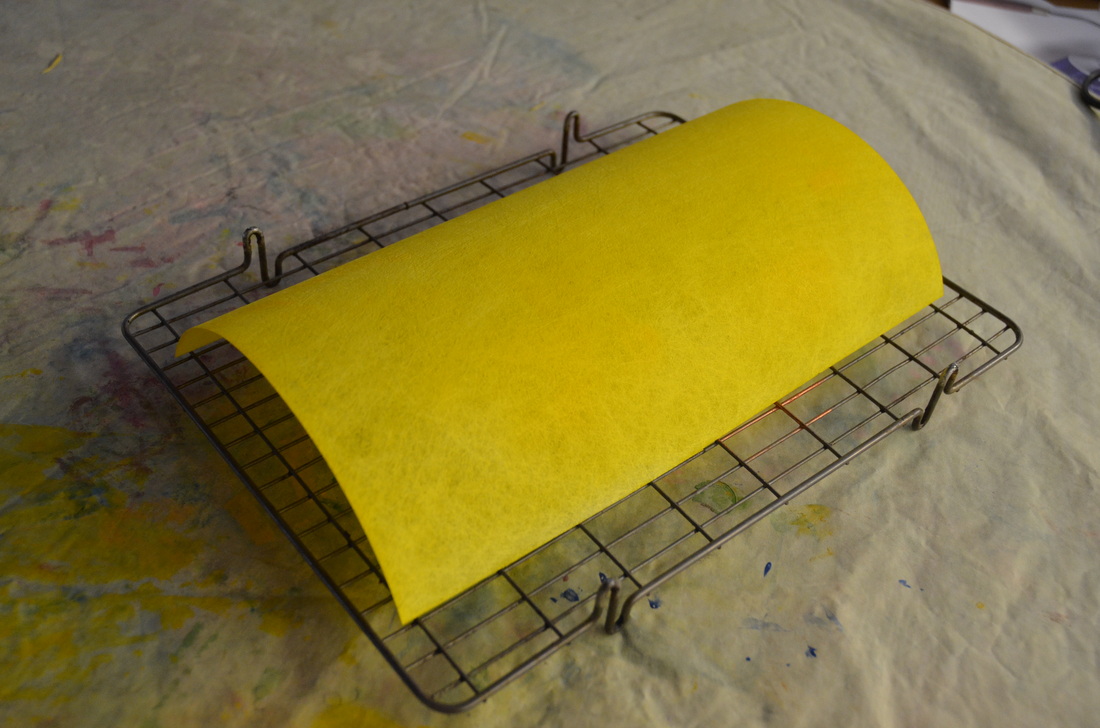
When that was fully dry, I ran the sheet of Lutradur through my computer so that a butterfly design printed straight onto it (in this photo, I have printed my dog Jack's image, but the butterfly was done the same way). Because of the stiffness of Lutradur, I didn't have to secure it to freezer paper before printing, it just went through the printer beautifully. 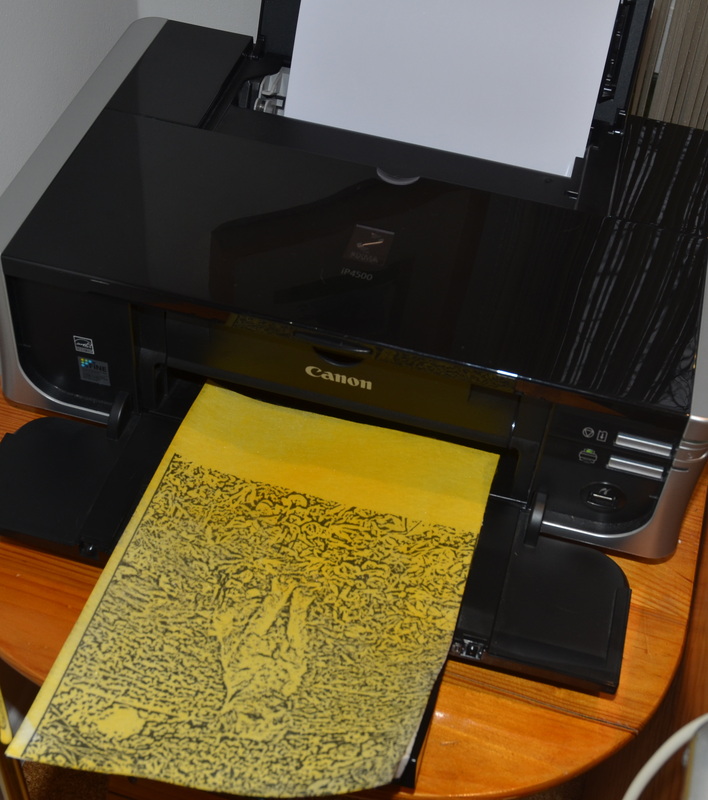
Next I layered an orange synthetic organza over the top of the butterfly (I could see the printed design through it). I put a thick orange furnishing fabric underneath. After pinning the layers together, I thread painted the butterfly using a variegated orange/yellow/red thread (more on thread painting in my next post). 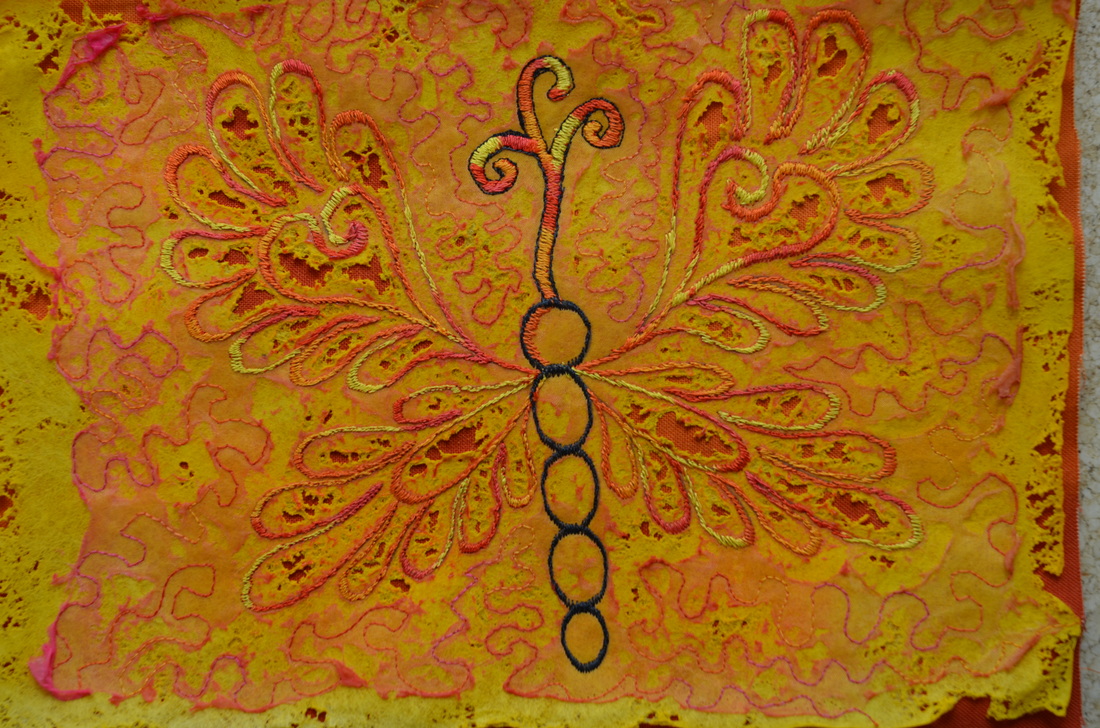
After the butterfly was thread painted I used a heat gun to distress the organza and Lutradur. You can see the areas within the wings and along the edges that are melted. I will probably mount this on fabric covered foam board so it can be hung.
|
Archives
March 2023
Categories
All
|
 RSS Feed